새소식
반응형
환경 구성
Spring Boot
Spring Security
Thymeleaf
Spring Boot pom.xml 파일에 아래와 같이 dependency 추가
<dependency>
<groupId>org.springframework.boot</groupId>
<artifactId>spring-boot-starter-security</artifactId>
</dependency>
위 dependency 추가 후 프로젝트 마우스 오른쪽 클릭 > Maven > Update Project... 실행
아래와 같이 SecurityConfig 자바 클래스 생성(본인이 생성한 경로이기 때문에 패키지명, 파일명은 알아서 설정해도됨)
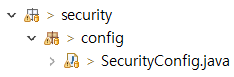
생성 후 아래와 같이 SecurityConfig 파일 설정
SecurityConfig.java
package com.baram.security.config;
import org.springframework.context.annotation.Configuration;
import org.springframework.security.config.annotation.web.builders.HttpSecurity;
import org.springframework.security.config.annotation.web.builders.WebSecurity;
import org.springframework.security.config.annotation.web.configuration.EnableWebSecurity;
import org.springframework.security.config.annotation.web.configuration.WebSecurityConfigurerAdapter;
// @Configuration = 해당 클래스는 Bean 등록 클래스라는걸 명시
// @EnableWebSecurity = Spring Security 활성화
@Configuration
@EnableWebSecurity
public class SecurityConfig extends WebSecurityConfigurerAdapter {
@Override
public void configure(WebSecurity web) throws Exception {
//정적 파일(css, js, img)에 대한 인증은 무시하도록 설정
web.ignoring().antMatchers("/static/**");
}
@Override
protected void configure(HttpSecurity http) throws Exception {
http
.csrf().disable()
.authorizeRequests()
.antMatchers(
"/main/**"
,"/static/**"
,"/market/main"
,"/boast/main"
,"/server/main"
,"/auth/login/main"
).permitAll()
.anyRequest().authenticated()
.and()
.formLogin()
.loginPage("/auth/login/main")
.usernameParameter("userName")
.passwordParameter("userPassword")
.loginProcessingUrl("/auth/loginCheck")
.failureUrl("/auth/login/main")
.defaultSuccessUrl("/auth/login/success")
.permitAll()
.and()
.logout()
.disable();
}
}
@Configuration
Spring IOC 컨테이너(Bean을 관리하는 컨테이너)에게 해당 클래스는 Bean 관련 클래스임을 명시하여 알려준다.
@EnableWebSecurity
SpringSecurity 활성화, Spring Security를 사용하기 위한 어노테이션
.csrf().disable()
기본적으로 Spring Security CSRF 설정은 enbaled(활성화) 되어 있다.
활성화 되어 있으면 AJAX 요청시 GET 방식을 제외한 POST/PUT/DELETE 요청에는 csrf 토큰이 포함되어 있어야
정상적인 요청을 할 수 있다. 본인은 아직 csrf 토큰 설정을 하지 않았으므로 비활성화 설정
.loginPage("login 페이지를 넘겨줄 Controller Mapping URL")
//ex
.loginPage("/auth/login/main")
: 해당 URL 요청이 왔을 때 Controller를 통해 로그인 페이지가 리턴되어 보여진다.
: 로그인 할 페이지를 넘겨주는 URL 정보
.usernameParameter("userName")
.passwordParameter("userPassword")
Html Form 태그 안의 id값과 passwor 값이 들어가는 input 태그의 name 속성 값, password 값과 매칭시켜 준다.
.loginProcessingUrl("로그인을 진행할 URL")
로그인페이지에서 아이디와 패스워드를 입력받아 인증 및 로그인을 진행할 구문이다.
해당 URL은 따로 Controller에 구현하는게 아니라 Spring Security Filter 에서 해당 URL이 들어올 경우
입력된 아이디, 패스워드와 DB에 저장된 아이디, 패스워드를 비교하여 로그인한다.
(해당 로그인 설정은 따로 설정할 예정이다.)
.failureUrl("로그인 실패했을 때 보여질 URL")
로그인 진행 후 실패했을 경우 보여줄 페이지 URL 설정
.defaultSuccessUrl("성공했을 때 보여질 URL")
로그인 성공 시 보여질 페이지 URL 설정
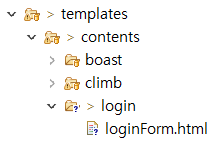
기본적인 틀은 Thymeleaf 이므로 따로 설정 설명은 하지 않겠다.
아래 이미지와 같이 loginForm.html 파일을 생성한다.
left.html
<!DOCTYPE html>
<html xmlns:th="http://www.thymeleaf.org">
<th:block th:fragment="leftF">
<head>
<script th:inline="javascript">
$(document).ready(function(){
})
let loginCheck = function(){
let userName = $("#userName").val();
let userPassword = $("#userPassword").val();
$.post(contextPath+"/auth/getRsaKey", function(data){
if(!data.modulus || !data.exponent){
alert("Authentication Fail");
}else {
submitEncryptLogin(userName, userPassword, data.modulus, data.exponent);
}
})
}
let submitEncryptLogin = function(userName, password, modulus, exponent){
let rsa = createRSA(modulus, exponent);
let secureUsername = rsa.encrypt(userName);
let securePassword = rsa.encrypt(password);
$("#userName").val(secureUsername);
$("#userPassword").val(securePassword);
//$("#login-form").submit();
}
</script>
</head>
<div class="left_container">
<div class="left_login_container" data-aos="fade-up">
<div class="row">
<div class="login-wrapper">
<h2>Login</h2>
<form method="post" th:action="@{/auth/loginCheck}" id="login-form">
<input type="text" id="userName" name="userName" placeholder="아이디">
<input type="password" id="userPassword" name="userPassword" placeholder="패스워드">
<label for="remember-check">
<input type="checkbox" id="remember-check">아이디 저장하기
</label>
</form>
<input class="left_login_button" type="submit" data-aos="zoom-in" value="로그인" onclick="loginCheck()">
<input class="left_signup_button" type="submit" data-aos="zoom-in" value="회원가입">
</div>
</div>
</div>
</div>
</th:block>
</html>
action="@{/auth/loginCheck}"
form 태그의 action 속성값은 로그인을 진행할 Spring Security의 loginProcessingUrl("") 값과 매칭되어야 한다.
해당 form 태그를 submit 할 시 Spring Security 에 의해 로그인이 진행된다.
let loginCheck = function(){
let userName = $("#userName").val();
let userPassword = $("#userPassword").val();
$.post(contextPath+"/auth/getRsaKey", function(data){
if(!data.modulus || !data.exponent){
alert("Authentication Fail");
}else {
submitEncryptLogin(userName, userPassword, data.modulus, data.exponent);
}
})
}
let submitEncryptLogin = function(userName, password, modulus, exponent){
// let rsa = createRSA(modulus, exponent);
// let secureUsername = rsa.encrypt(userName);
// let securePassword = rsa.encrypt(password);
// $("#userName").val(secureUsername);
// $("#userPassword").val(securePassword);
$("#login-form").submit();
}
로그인을 진행하기 전 아이디와 패스워드를 평문으로 넘기지 않고 RSA 암호화를 통해 데이터를 암호화 한 후
넘긴다. RSA 암호화를 통해 사용자 아이디와 패스워드를 암호화 한 후 Html dom에 재설정한다.
재설정 후에 form 태그 Submit을 진행하면 form 태그 action 정보인 "/auth/loginCheck" 와
Spring Security의 ".loginProcessingUrl("/auth/loginCheck")" 설정에 의해 로그인이 진행된다.
RSA 암호화를 시킨 후 submit을 통해 서버로 보냈을 때 서버는 Spring Security 필터를 통해
복호화를 시켜줘야한다. 아직 필터 설정이 안됐으므로 암호화내용은 주석처리 해놓는다.
로그인 페이지 설정을 위한 Controller 을 생성한다.
아래 이미지와 같이 AuthController.java 클래스 파일을 생성한다.
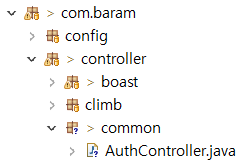
AuthController.java
package com.baram.controller.common;
import java.security.NoSuchAlgorithmException;
import java.security.spec.InvalidKeySpecException;
import java.util.HashMap;
import javax.servlet.http.HttpSession;
import org.springframework.stereotype.Controller;
import org.springframework.ui.ModelMap;
import org.springframework.web.bind.annotation.GetMapping;
import org.springframework.web.bind.annotation.RequestMapping;
import org.springframework.web.bind.annotation.ResponseBody;
import com.baram.util.CryptoRSA;
@Controller
@RequestMapping(value="/auth")
public class AuthController {
/*
* 로그인 화면
*/
@GetMapping(value="/login/main")
public String loginMain(ModelMap model, HttpSession session) {
checkRsaKey(session);
return "contents/login/loginForm";
}
@RequestMapping(value="/login/success")
public String loginSuccess() {
return "contents/login/loginSuccess";
}
@RequestMapping(value="/getRsaKey")
@ResponseBody
public HashMap<String, Object> getRsaKey(HttpSession session){
HashMap<String, Object> map = new HashMap<String, Object>();
map.put("exponent", session.getAttribute("SecurityPublicExponent"));
map.put("modulus", session.getAttribute("SecurityPublicModulus"));
return map;
}
private void checkRsaKey(HttpSession session) {
if(session.getAttribute("SecuritySessionKey") == null) {
CryptoRSA rsa;
try {
rsa = new CryptoRSA();
// 세션에 RSA 개인키를 저장한다.
session.setAttribute("SecuritySessionKey", rsa.getPrivateKey());
// 세션에 RSA 2개의 Key를 저장한다.
session.setAttribute("SecurityPublicExponent", rsa.getPublicKeyExponent());
session.setAttribute("SecurityPublicModulus", rsa.getPublicKeyModulus());
} catch (NoSuchAlgorithmException e) {
e.printStackTrace();
} catch (InvalidKeySpecException e) {
e.printStackTrace();
}
}
}
}
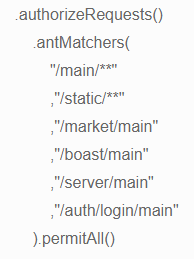
위 이미지 설정과 같이 Spring Security Config에서 설정한 antMatchers 값을 제외한 모든 URL은 .loginPage("/auth/login/main") 설정에 의해 로그인페이지로 이동된다.
* antMatchers에 설정된 URL은 페이지에 접근할 수 있는 예외 URL 설정이다.
@RequestMapping(value="/login/success")
public String loginSuccess() {
return "contents/login/loginSuccess";
}
로그인 성공 확인을 위한 테스트 페이지
@GetMapping(value="/login/main")
public String loginMain(ModelMap model, HttpSession session) {
checkRsaKey(session);
return "contents/login/loginForm";
}
private void checkRsaKey(HttpSession session) {
if(session.getAttribute("SecuritySessionKey") == null) {
CryptoRSA rsa;
try {
rsa = new CryptoRSA();
// 세션에 RSA 개인키를 저장한다.
session.setAttribute("SecuritySessionKey", rsa.getPrivateKey());
// 세션에 RSA 2개의 Key를 저장한다.
session.setAttribute("SecurityPublicExponent", rsa.getPublicKeyExponent());
session.setAttribute("SecurityPublicModulus", rsa.getPublicKeyModulus());
} catch (NoSuchAlgorithmException e) {
e.printStackTrace();
} catch (InvalidKeySpecException e) {
e.printStackTrace();
}
}
}
로그인 페이지를 Return 하는 Controller의 메서드이다.
checkRsaKey(session) 함수를 통해 로그인할 때 사용할 RSA 암호화 키를 Session에다 설정한다.
첫진입인지 확인하기 위해 Session 객체에 SecuritySessionKey 값이 있는지 확인한 후 없을 경우
Session 값에 RSA 개인키, 암호화에 필요한 Exponent, Modulus 값을 설정한다.
@RequestMapping(value="/getRsaKey")
@ResponseBody
public HashMap<String, Object> getRsaKey(HttpSession session){
HashMap<String, Object> map = new HashMap<String, Object>();
map.put("exponent", session.getAttribute("SecurityPublicExponent"));
map.put("modulus", session.getAttribute("SecurityPublicModulus"));
return map;
}
사용자의 로그인정보인 아이디와 패스워드를 암호화하기 위해 사용자 세션값에서 RSA 암호화 키를
가져와서 넘겨주는 메서드이다.
******************RSA 설정하는 클래스파일 제공
Spring Security Config 에서 설정한 .loginProcessingUrl("/auth/loginCheck") 에 의해 해당 URL로 요청이 올 경우
로그인 인증과정을 거친다.
로그인 아이디와 패스워드를 전달받아 인증을 처리하는건 AuthenticationFilter 이다.
AuthenticationFilter는 사용자가 입력한 아이디를 불러오기 위해 Spring Security 에서 제공하는
UserDetailsService 인터페이스를 구현한다.
또한 사용자가 입력한 아이디, 패스워드와 비교하기 위해 UserDetails 인터페이스를 구현하고 있는
객체를 선언해야 한다. 사용자가 입력한 아이디를 통해 DB에서
패스워드, 권한을 불러오고 해당 데이터를 UserDetails를 구현한 객체에다가 집어넣어 비교하게 된다.
순서를 정리하면 아래와 같다.
1. 사용자가 입력한 아이디, 패스워드를 비교하기 위한 객체 생성(UserDetails 인터페이스를 구현한 객체)
2. 로그인 인증을 위해 UserDetailsService 인터페이스를 구현한 Service 클래스 파일 생성
3. UserDetailsService 인터페이스에서 실제로 사용자 아이디를 불러오고 인증을 진행하는 메서드인
loadUserByUsername(String loginId) 를 @override
4. loadUserByUsername 메서드에서 loginId 값에 해당하는 로그인 정보를 DB 에서 불러온다.
5. UserDetails 인터페이스를 구현한 객체에다가 DB 에서 불러온 정보를 저장한 후 return 하면
로그인 인증을 진행한다.
아래와 같이 UserDetails 를 구현한 AuthUserDetailsEntity 를 생성한다.
public class AuthUserDeatilsEntity implements UserDetails {
private static final long serialVersionUID = SpringSecurityCoreVersion.SERIAL_VERSION_UID;
private String username;
private String password;
private boolean isEnabled;
private boolean isAccountNonExpired;
private boolean isAccountNonLocked;
private boolean isCredentialsNonExpired;
private Collection<? extends GrantedAuthority>authorities;
@Override
public String getUsername() {
return username;
}
public void setUsername(String username) {
this.username = username;
}
@Override
public String getPassword() {
return password;
}
public void setPassword(String password) {
this.password = password;
}
@Override
public boolean isEnabled() {
return isEnabled;
}
public void setEnabled(boolean enabled) {
isEnabled = enabled;
}
@Override
public boolean isAccountNonExpired() {
return isAccountNonExpired;
}
public void setAccountNonExpired(boolean accountNonExpired) {
isAccountNonExpired = accountNonExpired;
}
@Override
public boolean isAccountNonLocked() {
return isAccountNonLocked;
}
public void setAccountNonLocked(boolean accountNonLocked) {
isAccountNonLocked = accountNonLocked;
}
@Override
public boolean isCredentialsNonExpired() {
return isCredentialsNonExpired;
}
public void setCredentialsNonExpired(boolean credentialsNonExpired) {
isCredentialsNonExpired = credentialsNonExpired;
}
@Override
public Collection<? extends GrantedAuthority> getAuthorities() {
return authorities;
}
public void setAuthorities(Collection<? extends GrantedAuthority> authorities) {
this.authorities = authorities;
}
@Override
public String toString() {
return "CustomUserDetails [username=" + username + ", password=" + password + ",
isEnabled=" + isEnabled+ ", isAccountNonExpired=" + isAccountNonExpired + ",
isAccountNonLocked=" + isAccountNonLocked+ ", isCredentialsNonExpired=" +
isCredentialsNonExpired + ", authorities=" + authorities + "]";
}
}
getUsername()
사용자 ID를 반환한다.
getPassword()
사용자 패스워드를 반환한다.
isEnabled()
계정 사용 가능 여부를 반환한다.
isAccountNonExpired()
계정 만료 여부를 반환한다.
isAccountNonLocked()
계정 잠금 여부를 반환한다.
isCredentialsNonExpired()
패스워드 만료 여부를 반환한다.
getAuthorities()
계정 권한을 반환한다.
UserDetailsService 인터페이스의 메서드인 loadUserByUsername(String loginId) 에는 사용자가
입력한 ID를 불러온다. 사용자가 입력한 ID를 DB에 조회해 회원가입한 아이디, 패스워드, 권한을 불러올 Entity 객체를
하나 생성한다.
@Getter
@Setter
public class UserEntity {
int b_seq;
String b_name;
String b_pw;
String b_email;
String b_phone;
String b_role;
String create_name;
Date create_time;
String update_name;
Date update_time;
}
loadUserByUsername(String loginId) 에 사용자가 입력한 id가 넘어왔으므로 해당 loginId 를 DB에 비교해
회원가입한 로그인정보를 불러온다.
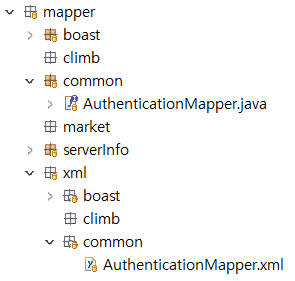
아래 이미지와 같이 Service, mapper, mapper.xml 파일을 생성한다.
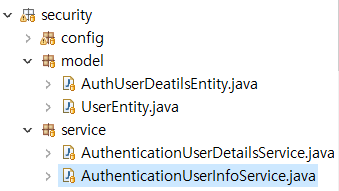
AuthenticationUserInfoService
@Service
public class AuthenticationUserInfoService {
private SqlSession sqlSession;
public AuthenticationUserInfoService(SqlSession sqlSession) {
this.sqlSession = sqlSession;
}
public UserEntity userIdInfo(String userName) {
AuthenticationMapper mapper = sqlSession.getMapper(AuthenticationMapper.class);
UserEntity ue = mapper.userIdInfo(userName);
return ue;
}
}
사용자가 입력한 ID를 해당 userIdInfo(String userName) 로 보내서 DB 데이터를 가져오기 위해 Mapper로 전달한다.
AuthenticationMapper Interface
@Mapper
public interface AuthenticationMapper {
public UserEntity userIdInfo(@Param("userName") String userName);
}
AuthenticationMapper.xml
<?xml version="1.0" encoding="UTF-8"?>
<!DOCTYPE mapper PUBLIC "-//mybatis.org//DTD Mapper 3.0//EN" "http://mybatis.org/dtd/mybatis-3-mapper.dtd">
<mapper namespace="com.baram.mapper.common.AuthenticationMapper">
<select id="userIdInfo" parameterType="java.lang.String" resultType="com.baram.security.model.UserEntity">
SELECT * FROM b_user WHERE b_name = #{userName}
</select>
</mapper>
사용자 ID에 해당하는 사용자 정보를 DB에서 가져오기 위해 쿼리문을 실행한다.
실행한 데이터는 UserEntity에 담겨져 반환한다.
@Service
public class AuthenticationUserDetailsService implements UserDetailsService {
@Autowired
private AuthenticationUserInfoService service;
@Override
public UserDetails loadUserByUsername(String userName) throws UsernameNotFoundException {
UserEntity entity = service.userIdInfo(userName);
AuthUserDeatilsEntity userDetails = new AuthUserDeatilsEntity();
//PasswordEncoder passwordEncoder = PasswordEncoderFactories.createDelegatingPasswordEncoder();
if(entity != null) {
userDetails.setUsername(entity.getB_name());
//userDetails.setPassword(passwordEncoder.encode(entity.getB_pw()));
userDetails.setPassword(entity.getB_pw());
userDetails.setEnabled(true);
userDetails.setAccountNonExpired(true);
userDetails.setAccountNonLocked(true);
userDetails.setCredentialsNonExpired(true);
} else {
throw new UsernameNotFoundException("사용자가 입력한 아이디에 해당하는 사용자를 찾을 수 없음");
}
return userDetails;
}
}
UserDetailsService 인터페이스를 구현하여 AuthenticationUserDetailsService 클래스파일을 생성한다.
사용자가 로그인 정보를 입력하여 security 의 loginProccessUrl 로 요청하면 loadUserByUserName 메서드의
파라미터인 userName 으로 아이디값이 들어온다.
해당 userName 을 DB에서 검색하여 로그인정보와 비교하게 된다.
로그인정보를 불러와 UserDetails 객체를 구현한 AuthUserDetailsEntity 에 위와 같이 설정한다.
설정한 후 return하게 되면 사용자가 입력한 로그인정보와 DB에서 불러온 로그인정보를 비교하게 된다.
아래는 사용자 확인 테스트 데이터인 DB 데이터이다.
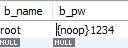
b_pw 에 {noop} 이란 데이터가 들어가 있다.
이유는 Spring Security 5 버전 이상부터는 따로 암호화 설정을 하지 않으면 DB 패스워드 앞에 어떤 PasswordEncoder 를 쓸지 정의해놔야 에러가 나지 않는다.
Spring Security 기본 PasswordEncoder 는 bcrypt 이다.
기본 설정인 bcrypt를 Spring Security 에게 알려주기 위해 {noop} 을 설정했다.
자세한 내용은 아래 참고 해주세요
https://taesan94.tistory.com/119
[SpringSecurity] java.lang.IllegalArgumentException: There is no PasswordEncoder mapped for the id "null"
참조 블로그 ! [ 참조링크 1 ] [ 허니몬(Honeymon)의 자바guru ] [ 참조링크 3 ] SpringSecurity를 적용하기위해서, 계정테이블에 ID : TEST, PW : 1234의 데이터를 직접 INSERT하였다. 이후에 로그인 form에서 로그인
taesan94.tistory.com
위처럼 설정하고 로그인 시도를 하면
아래와 같이 성공페이지가 뜬다.

| [Spring Boot] Spring Security WebSecurityConfigurerAdapter Deprecated 로 인해 Security 설정 바꿔보기 (0) | 2022.11.04 |
|---|---|
| [Spring Boot] Ajax 요청시 302 Redirect (302 에러) (0) | 2022.11.01 |
| lombok 설정 (0) | 2022.10.26 |
| Spring Boot Thymeleaf Dialect Layout 설정 (0) | 2022.10.06 |
| @Controller, @RestController (0) | 2022.08.09 |
소중한 공감 감사합니다